
Mechanical Engineering & Public Policy Graduate

PUZZLE+
Do more with your puzzles
As a child, puzzles were one of my favorite things to pass time with. This interest carried through into my adult life, and though I do them less sporadically, I like to keep them and decorate my home with them. Being a college student, I didn't want to spend money on frames, so I just taped them together and hung them on the wall, which while great in the moment, makes it difficult for transport now that I am moving several states away. Hanging all the puzzles I have would also get quite overwhelming after a while, and a more interchangeable display would be ideal. So, for my final project in DIY Design, I decided to make a coffee table with included storage for puzzles, and a plexiglass table top that would let me put one puzzle on display, changing it out as I wish. This table also includes legs that fold right into the body of the table, providing easy and safe puzzle storage for transportation.
TARGET USER MOODBOARD

DESIGN MOODBOARD
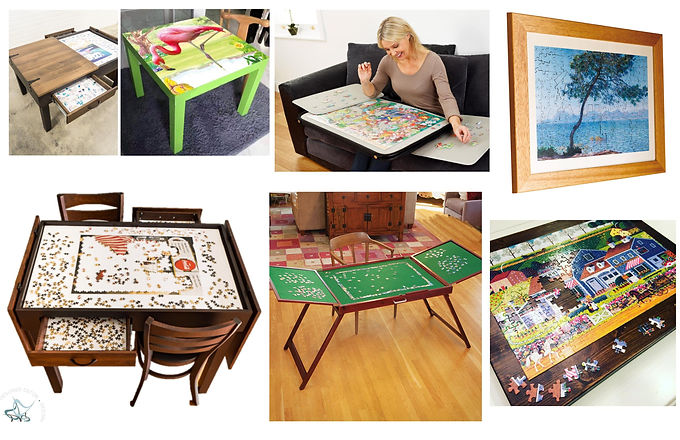
SHOWCASE IMAGES
 |  |  |
|---|---|---|
 |  |  |
 |  |  |
 |
PROTOTYPING PLAN
Below is a preliminary bill of materials

All required materials are linked below:
Hinges
Plexiglass
Screws
2" x 2" wood
1/2 in plywood
1/4 in plywood
Wood stain
Producing a physical prototype should be fairly straightforward now that the digital package is complete.
After obtaining all the materials listed above, I will cut everything to size, as detailed in the CAD package.
Next, I will use wood glue and nails to put together each layer of the table. First is the frame that will hold the plexiglass and consists of four sides glued and nailed together. I will also glue the plexiglass in at this step. Next, is the storage frame to put puzzles, which will consist of three attached sides, and one side that you can take in and out to store the puzzles. Underneath that will be a rectangular base for everything to rest on. These three layers will be glued together, and then I will use a nail gun to reinforce the joining.
Then, I will join the four pieces of wood to form the leg lousing, so that they don’t stick out when folded. Again they will be glued and nailed together, and then the whole thing will be mounted to the top of the table.
Finally, I will screw in the hinges to the bottom of the table and the legs.
After everything is finished, I will use a walnut stain on all wood components to complete the table.

Below is a rough outline of the work timetable, allowing for time between steps for materials to dry.

PRODUCT FLYER
